Amiga's Mechanical Assembly
Your Amiga is a modular platform designed to adapt to different activities and attachments, and we encourage our customers to experiment with different configurations based on their use case. To achieve maximum performance of your Amiga, there are a few design rules you should observe:
- The ratio between your Amiga's length and width should be 0.6 or less.
- E.g., a 48" wheelbase Amiga should have a track width of approximately
48 * 0.6 ~ 27 inches.
- E.g., a 48" wheelbase Amiga should have a track width of approximately
Operating with larger ratios will lead to premature overheating of your motors and eventually permanent damage. A fail safe mechanism to protect the motors from overheating is hard coded into the Dashboard's firmware. To reduce the risk of damage due to overheating, our motors will stop for cooling once they reach 80°C (176°F). This is highly dependent on physical parameters like the robot center of gravity, duty cycle, how many turns you are using, etc.
- Note there is a tradeoff here: larger bases are more stable but cause extra effort on the outside wheels when turning.
- Unless otherwise stated, we recommend 23 lb.ft (31 N.m) of torque on all bolts and nuts in your Amiga.
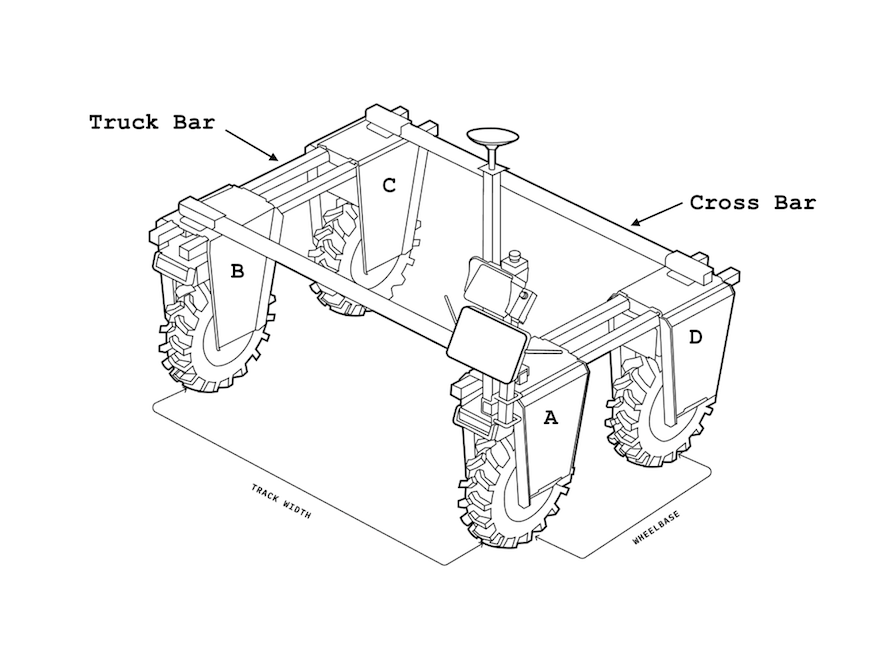
Length (wheel_track)
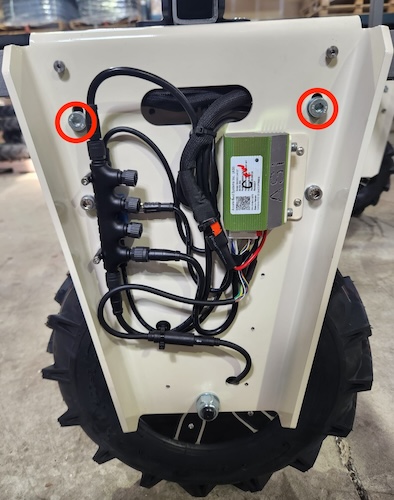
- To change the wheelbase length, raise your Amiga using a scissor lift or a Farm Jack. Loosen the 7 mm Allen bolts highlighted in the image below (on both sides of the fork). The forks will slide easily.
- When tightening them back, make sure the fork tops are parallel to the ground by tightening the bolts evenly. If the inner clamps that keep the Truck Bars locked are uneven, the wheels will not be perpendicular to the ground, experiencing higher-than-necessary effort and possibly overheating.
When you change your Amiga's size, remember to change the wheel_track parameter on your
dashboard and your
Brain Settings (if applicable).
If there is a mismatch between your physical setup and your dashboard configuration, you will
likely experience overheating and erratic motor speeds when turning.
Width (track_width)
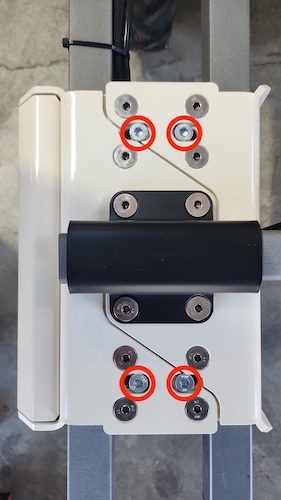
- To change the Track Width (or how wide the robot is), raise your robot and loosen the Allen bolts on the side of the clamps on top of the forks. The forks on that side will slide easily.
- Make sure you tighten all bolts. Loose bolts will cause your crossbars to wear out and make your Amiga less rigid.
If you have an Intelligence Kit, remember to change the wheelbase parameter on your
Brain Settings.
If there is a mismatch between your physical setup and your geometry settings in your Brain, you
will likely experience offsets when following tracks.
When you change wheel_track or track_width (or both) you need to make sure your wheels are
parallel. The best way to achieve this is:
- Front and rear
wheel_trackare within 1/4" (6 mm) of each other. - Left and right
track_widthare within 1/4" (6 mm) of each other. - The diagonals from fork A to fork C, and fork B to fork D are within 1/4" (6 mm) of each other. You can use two arbitrary points on each fork, as long as they are equivalent on each one.
Using an Amiga that is not square can lead to lower performance and motor overheating issues.
Pendant and Intelligence Kit Mast
- You can move the pendant using the existing U-clamps anywhere on your Amiga. If the cables are not long enough, you can change their connections to any of the forks or order extensions from our online shop.
- If you move the pendant to the reverse side of the robot, you can use the
flip_joystickparameter on your dashboard.
If you change your Intelligence Kit mount location, remember to change the GPS and IMU offset
parameter on your Brain Settings.
If there is a mismatch between your physical setup and your geometry settings in your Brain, you
will likely experience offsets when following tracks.